Learn how to screenshot on Mac
There are various ways to learn how to screenshot mac:
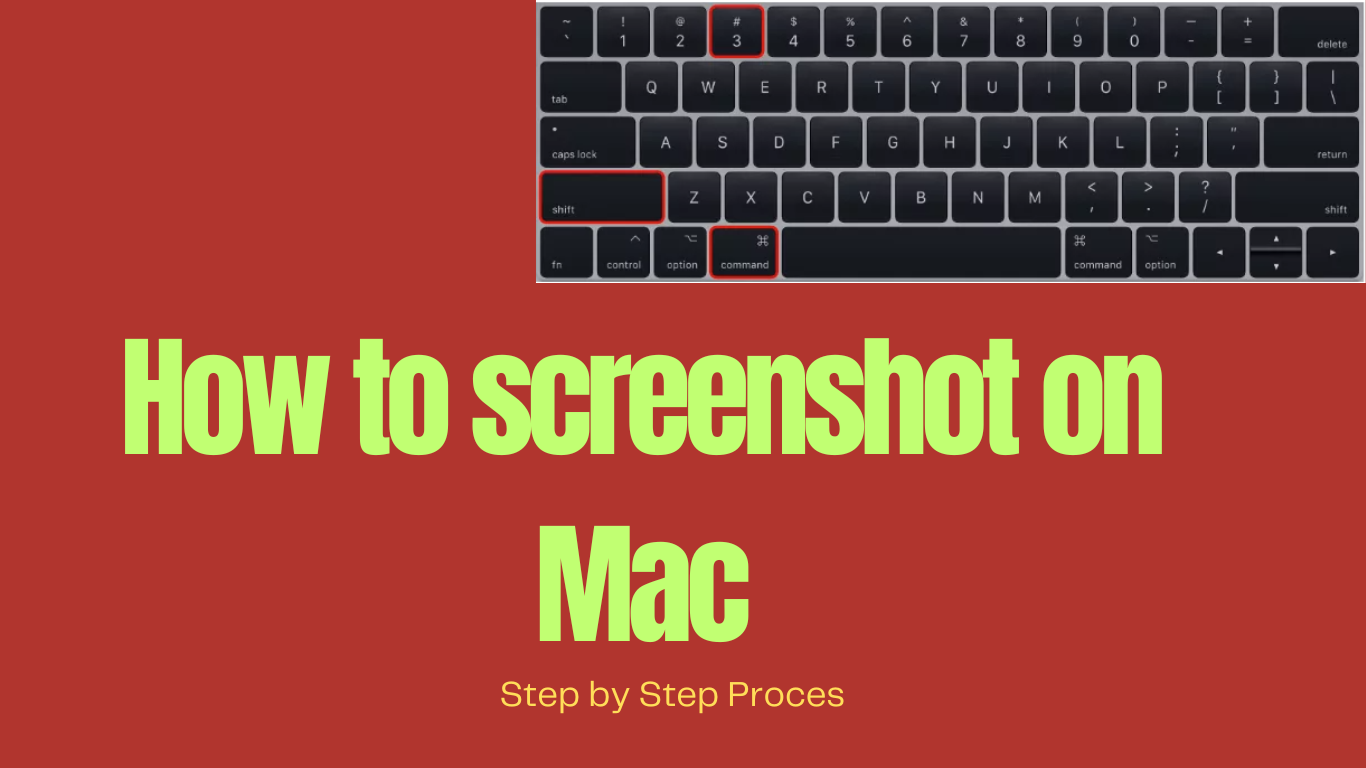
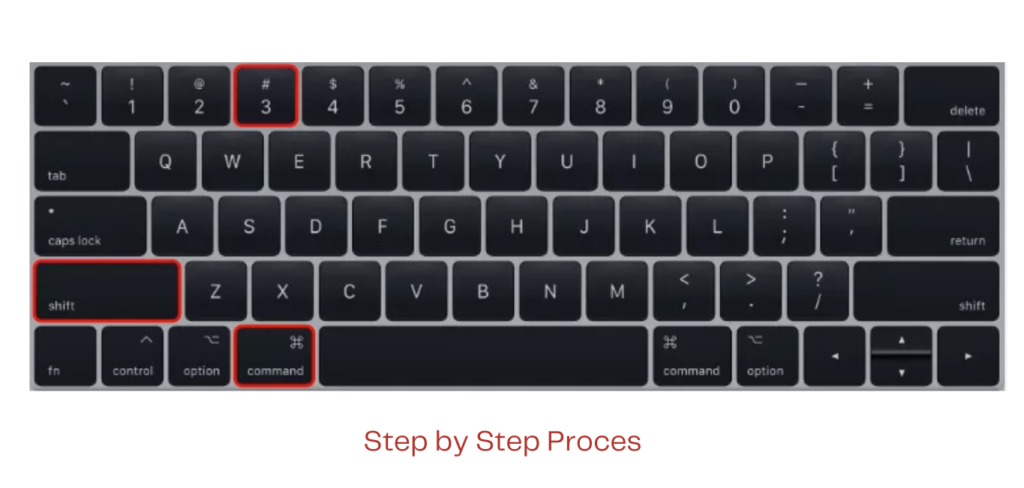
- To capture the full screen, press Command (⌘) + Shift + 3}. By default, the screen capture is saved as a file to your desktop.
- Take a Screenshot of the Selected Area: Press {Shift + 4} + Command (⌘). The crosshair will show in your cursor. To select the region to capture, click and drag. To take a screenshot, release the mouse button. In addition, a file will be saved on your desktop.
- Record a specific window or menu: After hitting {Command (⌘) + Shift + 4}, press {Spacebar}. The camera symbol will appear where your cursor is. When you hover over a window or menu, it will highlight it.
- Click to capture the currently highlighted menu or window. In addition, a file will be saved on your desktop.
- To capture the Touch Bar, press Command () + Shift + 6 (on MacBook Pro with Touch Bar).
- After you take the photo, it appears on your desktop or in the folder where your Mac saves screenshots. By default, screenshots are saved as PNG files.
Additionally, you can use the built-in “Grab” screenshot application, which can be located in the “Applications” folder’s “Utilities” section. It provides more screenshot options, including the ability to capture specific screen items such as menus and schedule grabs.
A feature called “Screenshot Toolbar” is also included in macOS Catalina (and later versions). When you hit {Command (⌘) + Shift + 5}, a toolbar with various screenshot choices appears at the bottom of the screen. You can choose to snap a screenshot of the entire screen, a specific area, or a single window. Additionally, it provides screen recording capabilities.
Screenshot on mac computer (4 Methods)
Whether you’re compiling a visual instruction guide, capturing a standout moment from your digital life, or saving crucial information, the ability to take a screenshot on a Mac is an invaluable skill. Gone are the days of clunky print screens or camera shots of your display; your Mac provides a suite of simple and agile tools to create the perfect screen capture without any fuss. From comprehensive full-screen images to precision-targeted areas, learning how to screenshot on mac is a key digital competency for modern Mac users. This article will guide you through various methods to carry out a screenshot mac task, ensuring you can share and preserve your on-screen content with clarity and convenience. Whether it’s through the touch of a button or with the Preview app’s versatility, you’ll be ready to execute the perfect macbook screenshot with these easy-to-follow instructions.
Key Takeaways
- Discover multiple methods to capture your screen swiftly on MacOS.
- Learn easy-to-remember keyboard shortcuts for instant screen grabs.
- Understand how to leverage the Preview app for flexible screenshot options.
- Get tips on setting up your screen to ensure clean and relevant captures.
- Gain insight into editing and annotating screenshots directly on your Mac.
- Explore differences in screenshot tools between Mac and PC.
- Enhance your workflow with efficient screenshot techniques tailored to Mac users.
Understanding Your Mac’s Screenshot Function
Navigating macOS to capture the perfect mac screenshot might seem daunting at first, but once you understand the basic functions, you’ll find it as intuitive and powerful as the Mac itself. In this section, we’ll dive into the fundamentals of taking a screenshot on a mac and highlight the distinctive features that set it apart from the Windows screenshot experience.
The Basics of Mac Screenshots
The process to screen shot mac begins with a few simple keyboard shortcuts. With the press of a combination of keys, users can select to capture the entire screen, a specific window, or only a portion of it. The options are seamlessly integrated into macOS, empowering users to quickly snap what they need without interruption of their workflow.
Differences Between Mac and PC Screenshot Capabilities
While capturing screenshots on a Mac shares some similarities with Windows, such as the basic premise of capturing on-screen content, macOS offers unique capabilities that improve and simplify the experience. The following comparative table highlights the key differences between Mac and PC when it comes to taking screenshots, providing a clear overview of what to expect on each platform.
| Feature | macOS | Windows |
|---|---|---|
| Keyboard Shortcut | Multiple shortcuts with ‘Command’ key | Mainly ‘Print Screen’ key focused |
| Capture Options | Entire screen, window, or selected area | Entire screen or active window |
| Instant Editing | Markup tools readily available | Requires opening another program (e.g., Paint) |
| File Saving | Auto-saves to desktop or specified location | Clipboard copy, must paste to save |
| Preview Option | Press ‘Space’ for quick tool use | No built-in equivalent |
Preparing Your Screen for the Perfect Screenshot
Before capturing your ideal screenshot in Mac, spending a few moments preparing your display can make a significant difference. A well-organized screen not only looks professional but also emphasizes the information you are trying to convey. Below, we outline the necessary steps to enhance your screen’s appearance to take a screenshot in Mac that is as informative as it is visually compelling.
- Clean Your Desktop: Begin by removing any unnecessary files or shortcut icons from your desktop. This declutters the screen and brings focus to the window or application of interest.
- Close Extra Applications: Ensure to close any irrelevant software or apps that might distract or reveal personal information in your screenshot for Mac.
- Arrange Necessary Windows: Organize the windows you wish to capture, positioning them neatly and ensuring that they are in the foreground.
- Highlight Important Elements: If particular aspects of the screen are to be emphasized, use software tools to highlight these before taking your screenshot in Mac.
Additionally, it can be helpful to adjust your screen’s brightness and resolution to ensure that your screenshot is clear. Here’s a quick guide:
| Action | Objective | Instructions |
|---|---|---|
| Adjust Brightness | To make the screenshot more visually appealing | Access System Preferences > Displays > Brightness, and slide to adjust. |
| Alter Resolution | To enhance the clarity of your screenshot | Go to System Preferences > Displays, choose the ‘Scaled’ option, and select a resolution. |
Making optimal adjustments to your screen and executing a bit of pre-screenshot housekeeping ensures that you capture a pristine and accurate image. It’s these details that set a professional screenshot apart from a casual screen grab. Next time you screenshot in mac, take a moment to prep – your audience will notice the difference.
Default Mac Screenshot Shortcuts Every User Should Know
Having quick access to screenshot functions is vital for Mac users who need to capture their work efficiently. Apple’s macOS is equipped with a variety of keyboard shortcuts that significantly ease the process of taking a screenshot. Whether you are looking to share a high score from a game, a bug you’ve stumbled upon, or simply keep a record of an online transaction, knowing these shortcuts is a must. Let’s delve into the key combinations that will empower you to capture your screen with confidence.
Full-Screen Capture Keys
If you are wondering how to take a screenshot on Mac for the entire screen, it is quite simple. The most commonly used shortcut for this is Command (⌘) + Shift + 3. Pressing these keys simultaneously will capture your entire screen. The screenshot will be saved directly to your desktop by default, making it accessible for any immediate actions you wish to take.
Windowed Screenshot Shortcuts
There might be situations when you need a screenshot of a single window and not the entire screen. The shortcut Command (⌘) + Shift + 4 followed by pressing the Spacebar allows you to do just that. Once you trigger this shortcut, your cursor will transform into a camera icon, and you can then click on any window to capture it specifically. This shortcut screenshot Mac command is convenient and precise for focused captures.
Selective Area Snapshot Techniques
Sometimes, you only need a snippet of your screen. In such cases, knowing how to screenshot on Macbook for a selected area can save you editing time later on. Press Command (⌘) + Shift + 4 and you’ll see your cursor turn into crosshairs. Drag to select the area you want to capture and release to take the snapshot. This method gives you full control over the portion of the screen you’re capturing.
| Action | Shortcut |
|---|---|
| Full Screen Capture | Command (⌘) + Shift + 3 |
| Window Capture | Command (⌘) + Shift + 4, then Spacebar |
| Selective Area Capture | Command (⌘) + Shift + 4, then select area |
These easily memorizable shortcuts enhance your workflow and save time, making screen capturing on your Mac a breeze. Now that you’re armed with this knowledge, you can conveniently document and share your screen content with ease.
How to Screenshot on Mac with Preview
While keyboard shortcuts are handy for taking screenshots on Mac, the Preview application is an excellent alternative for those who prefer a graphical user interface (GUI). Whether you need additional flexibility or want to edit images right after capturing them, Preview offers a comprehensive set of tools that enhance the screenshot experience on Mac.
Opening Preview for Screen Captures
To begin taking screenshots on Mac using Preview, start by locating the Preview application. You can find it easily using Spotlight search or by navigating to your Applications folder. Once open, click on the ‘File’ menu in the top left corner of the screen and select ‘Take Screenshot’ from the dropdown options. You will then see a submenu with choices: ‘From Selection’, ‘From Window’, or ‘From Entire Screen’. Each option helps you tailor the screenshot on Mac to your specific requirements.
Navigating the Menu Options
Preview’s versatility is evident when you explore its menu options for Mac how to screenshot. For instance, ‘From Selection’ allows you to drag and select the exact area you want to capture. ‘From Window’ captures an active window after you click it, and ‘From Entire Screen’ will take a screenshot after a timer, giving you time to set up your screen precisely as you need it. Below is a table that compares these options for your reference:
| Option | Use Case | Benefit |
|---|---|---|
| ‘From Selection’ | Capturing a portion of the screen | Control over the specific area to capture |
| ‘From Window’ | Isolating and capturing a single window | Clutter-free screenshots without background distractions |
| ‘From Entire Screen’ | Recording the full screen | Comprehensive capture of all screen elements |
After making your selection and taking the screenshot with Preview, the image will open in a new window. From there, you can review and edit it immediately, or save it for further use. With these steps, taking screenshots on Mac using Preview becomes a simple process that fits into various workflows with ease.
Editing and Annotating Your Mac Screenshots
After mastering how to screenshot on Mac, the next step is to personalize and refine your capture. MacOS doesn’t just excel at taking a screenshot; it also provides robust tools that allow you to edit and annotate your images directly on your machine. From adding a quick note to highlighting vital statistics in a data snapshot, the ability to modify your screenshot on Mac is at your fingertips. Let’s dive into the built-in functions macOS offers and look at what third-party apps can bring to the table for enhancing your screen captures, learn if you are interested in how to screenshot on mac with windows keyboard, then this article is suitable for you.
Using Mac’s Built-In Markup Tools
Mac users can take advantage of the native Markup tools to quickly add textual descriptions, callouts, or even a splash of color to screenshots. To use these markup features, locate the screenshot you’ve taken in Finder and open it with the Preview application. Within Preview, the toolbar grants access to a variety of annotation tools including text boxes, sketch tools, shapes, and more. Whether you’re prepping an image for a presentation or providing feedback on a project, the markup tools provide a convenient way to take a screenshot in Mac and make it more informative and visually appealing.
Third-Party Apps for Enhanced Editing
For those looking to expand their editing repertoire beyond macOS’s default offerings, third-party applications present a plethora of advanced options. Apps like Skitch or Snagit offer sophisticated annotation and editing capabilities, ranging from pixel-perfect precision to fun and engaging visual effects. These applications not only bolster your ability to edit screenshots but also often include additional features such as screen recording and image sharing. If your work or creative endeavours demand more than the basic markup tools, exploring these third-party options may be the key to unlocking your full screenshot potential on Mac.
FAQ (Frequently asked questions).
How do I take a screenshot on my Mac?
To capture a full-screen snapshot on your Mac, press Command (⌘) + Shift + 3. The snapshot will be instantly saved to your desktop.
What are the keyboard shortcuts for taking various types of screenshots on Mac?
You have several options: – For full-screen capture, press Command (⌘) + Shift + 3. – To capture a selected region, press Command (⌘) + Shift + 4 and drag. – Capture a window by pressing Command (⌘) + Shift + 4 + Spacebar, then clicking on it. – To capture a menu, use Command (⌘) + Shift + 4, then Spacebar, and finally click on the menu.
Is it possible to save a screenshot to the clipboard instead of a file on a Mac?
To save a screenshot to the clipboard, press Command (⌘) + Shift + 4 or Command (⌘) + Shift + 3, then add the Control key.
Can I take screenshots on a Mac with Preview?
Absolutely! Open Preview, then click “File” in the menu bar at the top of the screen and select “Take Screenshot” from the dropdown menu. You will then have the choice of capturing the full screen, a window, or a specific area.
How can I annotate or edit a Mac screenshot after taking it?
After you’ve captured the snapshot, locate the file and double-click to open it in Preview. Use Preview’s markup toolbar to add text, shapes, and drawings to your snapshot. If you want more complex editing tools, consider using third-party programmes like as Skitch or Adobe Photoshop.
Do the screenshot instructions alter on a MacBook with a Touch Bar?
The essential actions remain the same, but if your MacBook has a Touch Bar, you can utilise it to capture a screenshot. To capture the Touch Bar content, press Command () + Shift + 6.
What should I do before taking a screenshot on my Mac to make it appear professional?
Close any superfluous applications or files, arrange windows, and clear up the desktop. Also, make sure that the screen items you wish to capture are clearly visible, and highlight them if necessary.
Can I use a third-party software to take screenshots on my Mac?
Yes, there are numerous third-party apps for Mac that may be used to create screenshots, with many offering extra functionality such as screen recording, timed grabs, and more editing choices. Some popular choices include Snagit, Lightshot, and CleanShot X.
Is there a built-in Mac software for organising and altering screenshots?
Yes, the Photos app on Mac can be used to organise screenshots. To edit a screenshot on a Mac that is not working, use the Markup tool immediately in the Finder preview or open the screenshot in Preview for more editing possibilities.
What are the major differences between taking a screenshot on a Mac and a PC?
To snap screenshots on a Mac, use keyboard shortcuts such as Command (⌘), Shift, and number keys. PCs commonly use the Print Screen or Snipping Tool applications. Macs save screenshots to the desktop by default, whereas PCs copy them to the clipboard or use the Snipping Tool.
What’s the best screenshot app for Mac?
Use Snagit,
Lightshot,
Greenshot, or Monosnap.
For Latest Posts: How to delete wallpaper on iphone